Five Quick Camera Repairs On The Road
Traveling and camera go hand in hand. Whether you’ve just hopped in the car for the day or boarded a long haul flight crossing continents and oceans … a camera in every travelers bag is a must.
For those who choose to travel with ‘full size’ camera, the occasional “oops” situations arise, and trust me I’ve been there. A broken camera, or a perceived broken camera, can ruin a trip, however … a few common breakdowns in camera equipment can easily be fixed with tape.
Having answered countless emails from photographers on the road, I have picked out five common repairs that photographers seem to need help with while traveling that can easily be repaired with tape.
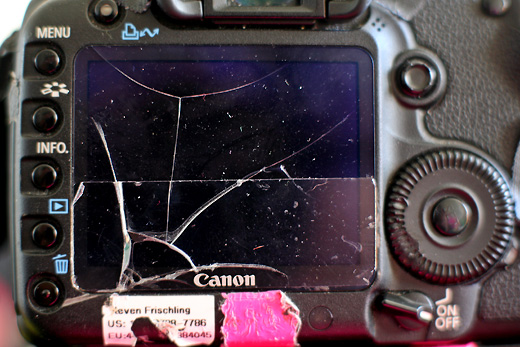
1) A cracked LCD screen cover (the clear plastic on the back of a digital camera is a screen cover, the screen is actually below the clear plastic) can be a bummer. I’ve broken more than I care to think about since I goy my first DSLR with an LCD screen (the Canon/Kodak DCS520 I got in 1998 never cracked, but the Nikon D1 which I got in 1999 screen cracked a few times … and the rest is history).
These cracked LCD screen cover, while annoying, can usually be held together with some packing tape. Clear packing tape placed smoothly other the screen, and then cut to the edges of the screen to prevent it from peeling up, works wonders. The cracks in the screen might make viewing the images a challenge, but think back to the days of film (or if you’ve been shooting digital long enough, like I have, the Kodak/Nikon NC2000) when there was no screen.
My Canon EOS 5D Mk II has packing tape over its cracked screen and the camera works perfectly.
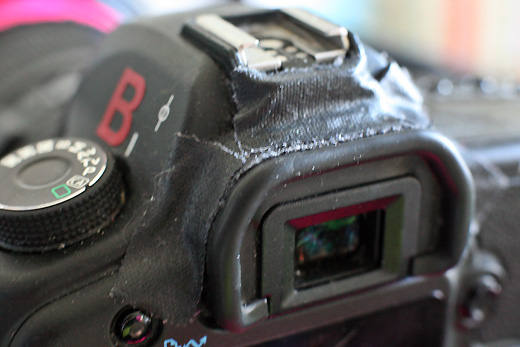
2) A loose eyecup that slides up or falls off. Losing an eyecup in a pain, it really is… which is why I usually have two spares in my bag at home … but on the road losing one is annoying. With eyecups placed over the view finder (ie: Not the circular ones you screw into some Nikon bodies) carefully placed gaffers tape will keep the eyepiece in place.
Taping eyepieces into place is a long time habit for me now. Each time a new camera arrives the first thing I do (literally) is place gaffers tape over the eyecup to keep it attached to the camera.
3) Lens hood clips that won’t stay shut, or a ‘twist on’ (bayonet) lens hood that constantly rotates off is a distraction when shooting. Rather than focusing on finding your photos, you’re constantly feeling the front of your lens to make sure you lens hood is still there. I hate when this happens … so to fix it, find some gaffers tape.
If your lens hood has ‘clips’, as pictured in the photo below, gaffers tape the clips so they stay in place. If you’re lens hood is a bayonet mount (one that twists on, rather than ‘pops on’ or screws in), places two pieces of gaffers tape, on opposite sides of the lens, connecting the lens hood to the lens. If you have a hood with clips I might suggest you do this as well.
I affix all my hoods to my lenses with gaffers tape to ensure they never just fall off.

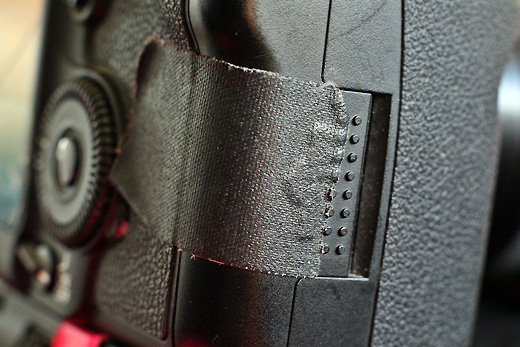
4) A memory card door on the side of a camera popping open can not only prevent you from shooting a photo, but also stop you from shooting all together should it break off. Some doors on the sides of camera become loose and just slide open, others get rubbed open by clothing, or they’ve simply gotten dinged without anyone noticing it.
How the door gets opened isn’t really important … but keeping it shut is. One piece of gaffers tape on the side if your camera, running from the body of the camera over the door to the camera body again will ensure you don’t encounter an open door. A shut door, keeping your memory card protected and preventing the door from snapping off … well that’s a good thing.
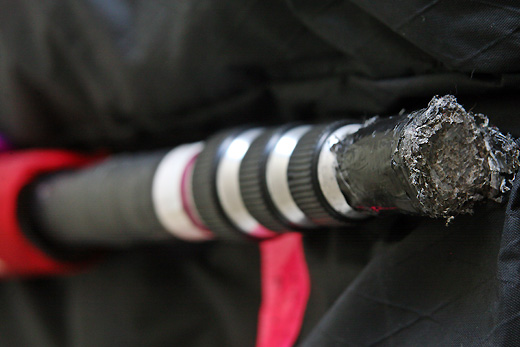
5) So you’ve lost, cracked, ripped obliterated the rubber foot at the bottom of you monopod … yea that’s no fun. No one wants to wreck the bottom of their monopod once the rubber has gone missing … but have no fear … duct tape is here.
Add this to the 1,000,001 uses for duct tape. Two pieces of duct tape over the bottom of your monopod, in a X-Pattern, secured by a strip of tape around the outside of the monopod secure in place … repeated about 8 times … will give your monopod its life back until you can replace the missing rubber foot. My Gitzo monopod has semi-permanently been repaired with duct tape and a carefully wedged piece of plastic in the gaping hole at the base of my monopod.
So … when traveling keep this in mind … tape is your friend … and your friend can help save your photo adventures.
Happy Flying!


With all those uses for duct tape you could of been on the red green show. Cool fixes none the less.
The Sacrificial Lens Hood…
On a recent trip I found a new use for my lens hood on my Nikon 12-24.
Riding on a tram I set my camera on top of my camera bag which was in my lap, but unfortunately I failed to put the strap around my neck.
When I stood up, you guessed it, my camera tumbled to the floor. Fortunately it landed on the edge of the lens hood which cracked in two places but it absorbed the impact shock and the camera came through without a scratch.
I used gaffers tape to patch the hood and continued to use it for the rest of the trip.
I have since replaced the lens hood, but I still have the sacrificial hood complete with the gaffers tape on display on a shelf as a reminder.
Great tips especially for beginning photogs like me who haven’t yet fully broken in their cameras (and wouldn’t know how to fix it if we did) 🙂
I first discovered gaffer tape back in about ’73 when I worked as a venue Roadie here in the UK.
Since then I have mended shoes, clothes, bags, boxes, windows etc.
Really like the finesse with which you sorted out the various practical problems 🙂
Interesting fixes !
I know i should get some gaffer with me when i travel but for some reason i always forget…